
To get the best from your guitar, it needs to be set up to not only be the best it can be, but also set-up the way you prefer playing. A well setup guitar will mean that every note resonates with clarity, the action feels just right under your fingers, and the instrument stays in tune across the fretboard.
This guide covers why setting up a guitar is important, and how to set up your guitar correctly.
Why set up your guitar?
1. Improved Playability
With a well-executed setup, playing the guitar feels effortless. The action, or the height of the strings above the fretboard, is adjusted to your preference, allowing for smooth fretting and comfortable chord changes. This means you can play for longer periods without experiencing fatigue in your fingers or hands.
2. Enhanced Tone and Sustain
Properly set up pickups and intonation contribute to a balanced and clear tone across all strings. The pickups are adjusted to the optimal height, capturing the nuances of your playing style while minimising unwanted noise or feedback. Additionally, accurate intonation ensures that each note rings true and in tune, enhancing sustain and overall tonal quality.
3. Reduced Fret Buzz
Fret buzz occurs when the strings make unwanted contact with the frets, resulting in a buzzing or rattling sound. A precise setup addresses this issue by adjusting the neck relief, nut height, and bridge action to eliminate buzzing while maintaining low string action for easy playability.
4. Stable Tuning
One of the most frustrating aspects of playing guitar is dealing with tuning instability. A proper setup includes meticulous attention to the nut and bridge, ensuring that the strings move freely through their respective slots without binding or catching. This promotes stable tuning, allowing you to focus on your playing without constantly re-tuning between songs or during performances.
How to set up your guitar
We set up all the guitars we make using an easy to remember formula – T.R.A.I.N. Follow the steps below in order to make sure your guitar is ready to play just the way you like it.
You are going to need some tools, so we have listed the ones you will need below.
It’s always a good idea to take this opportunity to fit a fresh set of strings and clean and condition the fretboard.
Let’s get the TRAIN started…
T – is for Tuning
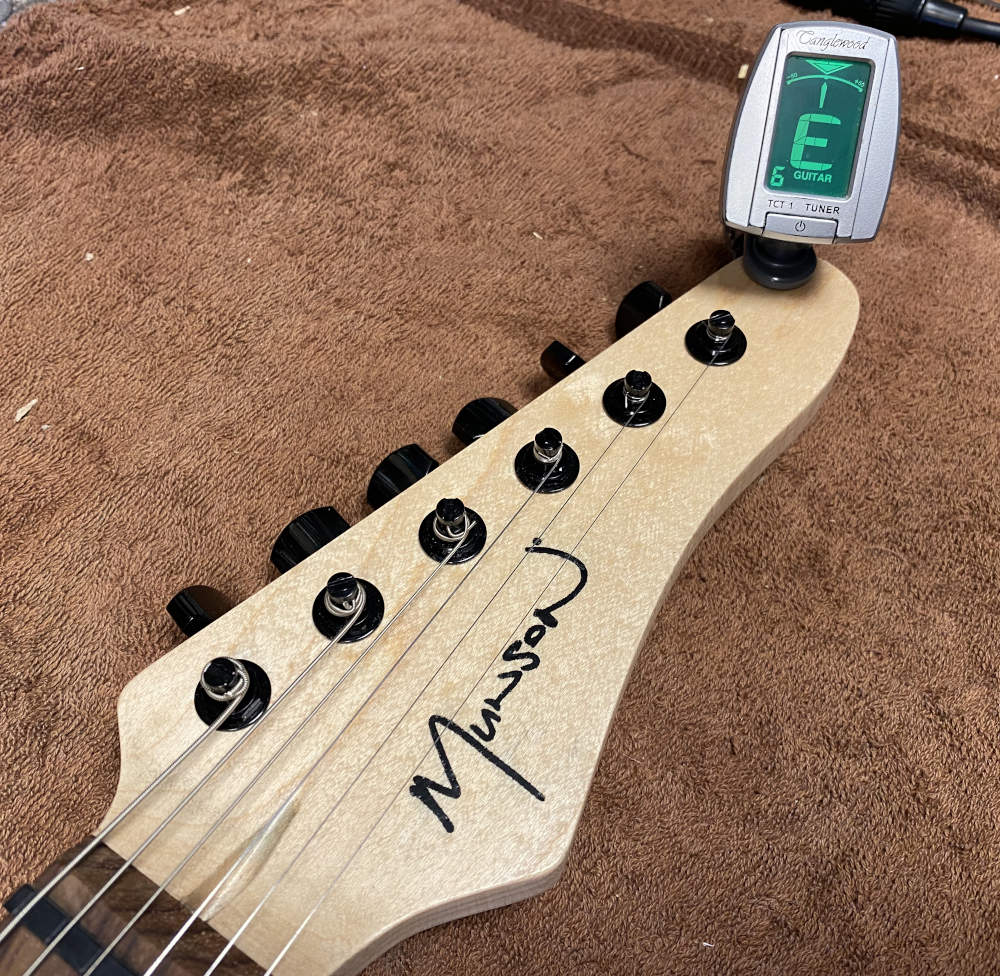
Firstly try and find a quiet space free from background noise that might interfere with your tuning process. While a guitar can be tuned by ear, the best results can be achieved by using an electronic tuner.
There are several types of tuners available, including clip-on tuners, pedal tuners, and smartphone apps. Clip-on tuners attach to the headstock of the guitar, pedal tuners sit on the floor and connect to your guitar via cable, while smartphone apps use the device’s microphone to detect pitch.
Next, decide on the tuning you want to use based on your musical preferences or the requirements of the song you’re playing. Standard tuning (EADGBE) is the most common, but alternate tunings like drop D (DADGBE) or open tunings are also popular.
Turn on your tuner and make sure it’s set to the correct tuning mode (e.g. chromatic, guitar, bass).
Start with the low E string (6th String): Pluck the string and check the tuner display. The aim is to adjust the tuning peg until the tuner indicates that the string is in tune. Carry on and do the same process on each string in order.
As a final check, start again and make any fine adjustments until all the strings are in tune. Strings may slightly detune as you adjust others, so it’s essential to double-check and make any necessary adjustments.
R – is for Relief
Adjusting the truss rod is a critical step in setting up an electric guitar, as it directly influences the instrument’s neck relief, or curvature. Neck relief refers to the slight bow in the neck that accommodates the tension of the strings. Proper neck relief ensures that the strings can vibrate freely without buzzing against the frets, while also facilitating comfortable playability.
Here’s a more detailed explanation of how to adjust the truss rod and why it’s necessary:
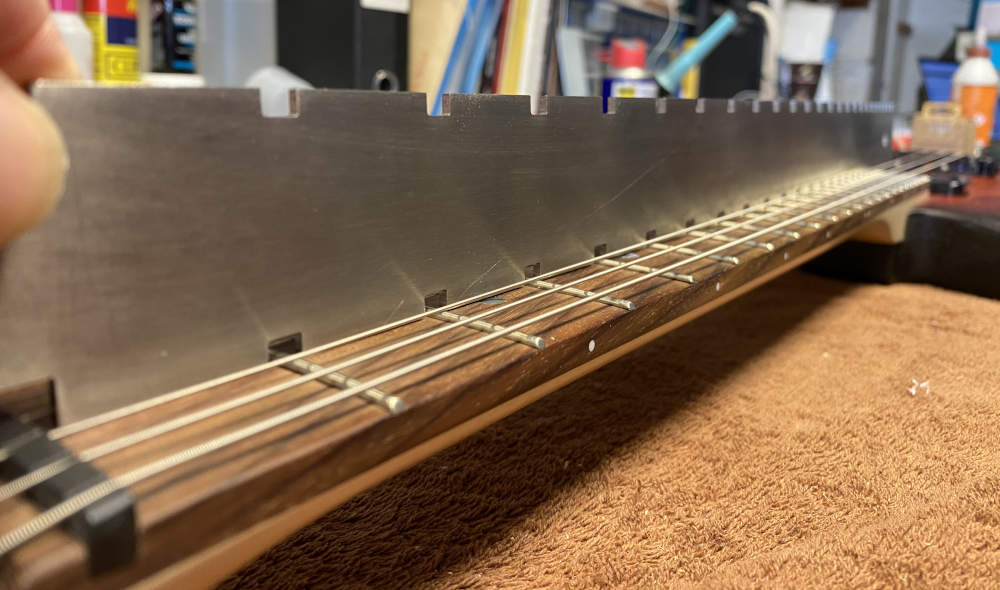
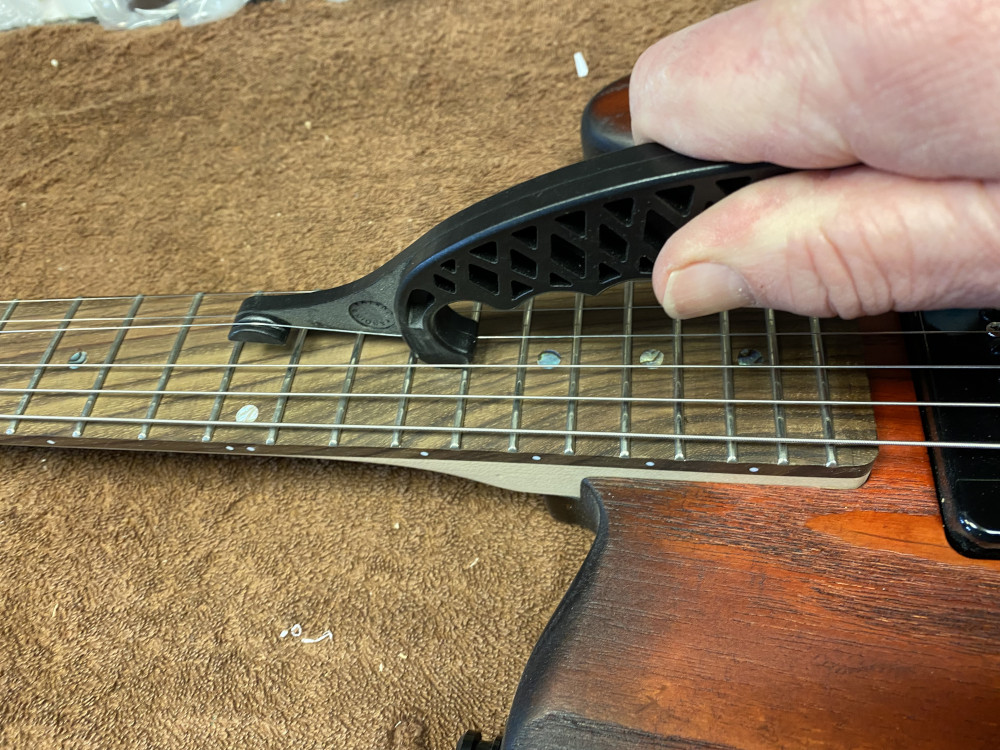
Before adjusting the truss rod, it’s essential to assess the current state of the neck. Sight down the neck from the headstock towards the body, looking for any visible signs of excessive bowing (back bow) or excessive straightness (forward bow). Traditionally a slight forward bow is desirable, and allows for a small gap between the strings and the frets in the middle of the neck. A more modern approach, especially when using engineered materials such as Richlite, which are more stable than traditional wood, is to have the neck flat, with zero bow.
You can also use a notched straight edge which will give you a more accurate indication of any bow in the neck.
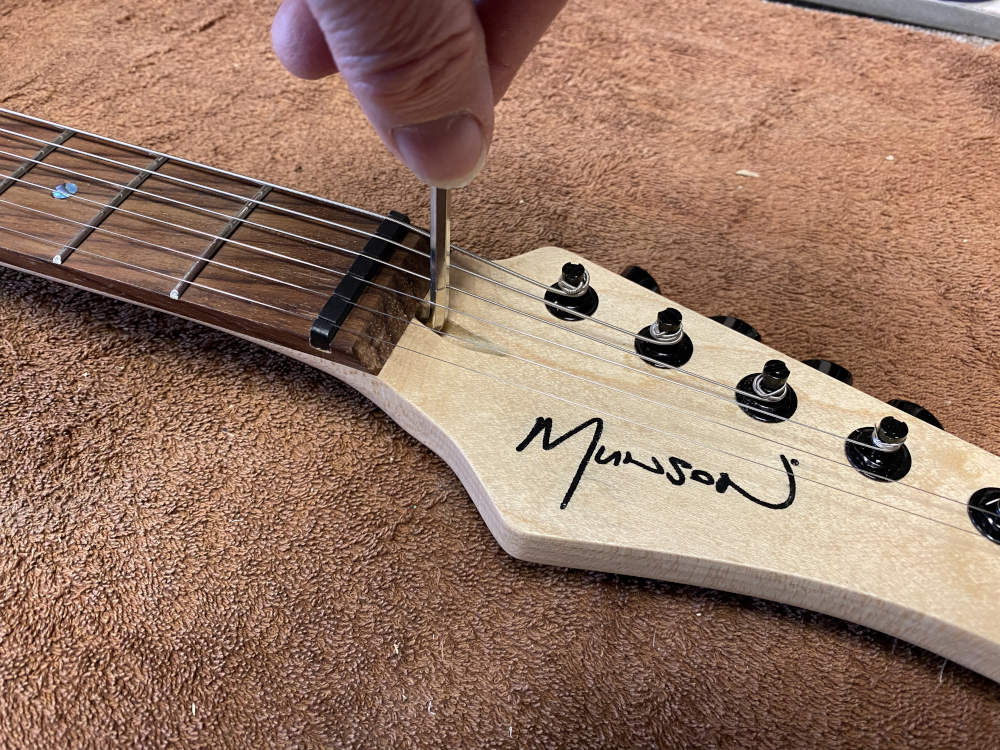
Truss rods are typically adjusted using an Allen wrench (hex key) that fits into the truss rod nut located either at the headstock or inside the guitar’s body near the neck joint. The size of the Allen wrench required varies depending on the guitar model, so it’s essential to have a set of wrenches to ensure you have the correct size.
Before making any adjustments to the truss rod, it’s advisable to loosen the guitar strings to reduce tension on the neck. This step helps prevent potential damage to the truss rod or neck when making adjustments.
Depending on the guitar’s design, the truss rod adjustment may be located either at the headstock, accessible through a cover or opening, or inside the body, accessed through the soundhole or control cavity. Use caution when accessing the truss rod to avoid damaging the guitar’s finish or components.
To make any adjustment, insert the appropriate Allen wrench into the truss rod nut and turn it clockwise or anticlockwise to adjust the rod’s tension. Turning the truss rod clockwise typically tightens the rod, reducing neck relief and straightening the neck, while turning it counterclockwise loosens the rod, allowing the neck to bow slightly.
After making adjustments to the truss rod, re-tune the guitar to pitch and check the neck relief by sighting down the neck or using a straightedge. Aim for a slight forward bow, typically around 0.010 to 0.020 inches of relief, measured at the 7th or 8th fret with the strings fretted at the first and last frets.
Repeat the adjustment process as needed until the desired neck relief is achieved. Be careful not to over-tighten the truss rod, as this can lead to neck damage or fret buzzing. It’s always better to make small, incremental adjustments and check the results frequently.
By adjusting the truss rod correctly, you can ensure that your guitar’s neck is properly aligned and provides optimal playability, allowing for comfortable fretting and smooth string action across the fretboard. If you’re unsure about making truss rod adjustments yourself, it’s always best to consult with a professional guitar technician or luthier to avoid potential damage to your instrument.
A – is for Action
Setting the string action on an electric guitar is a critical step in the setup process, as it directly affects playability, comfort, and overall tone. String action refers to the height of the strings above the fretboard, specifically measured at the 12th fret. This adjustment is crucial because it determines how easy or difficult it is to press down the strings and produce clean notes without unwanted buzzing. Here’s a detailed explanation of how to set string action and why it’s important:
Why Set String Action?
Proper string action ensures that the strings are at an optimal height for comfortable playing. If the action is too high, it can make fretting notes challenging and lead to hand fatigue. It can also cause the string to go out of tune if it is stretched when fretted. Conversely, if the action is too low, the strings may buzz against the frets, resulting in a loss of sustain and clarity.
String action also affects the guitar’s tone. Higher action can produce a fuller, richer sound with more sustain, while lower action can result in a brighter tone with faster response. Finding the right balance is crucial to achieving the desired sound. This is due to the proximity of the vibrating string to the pickups.
Setting String Action
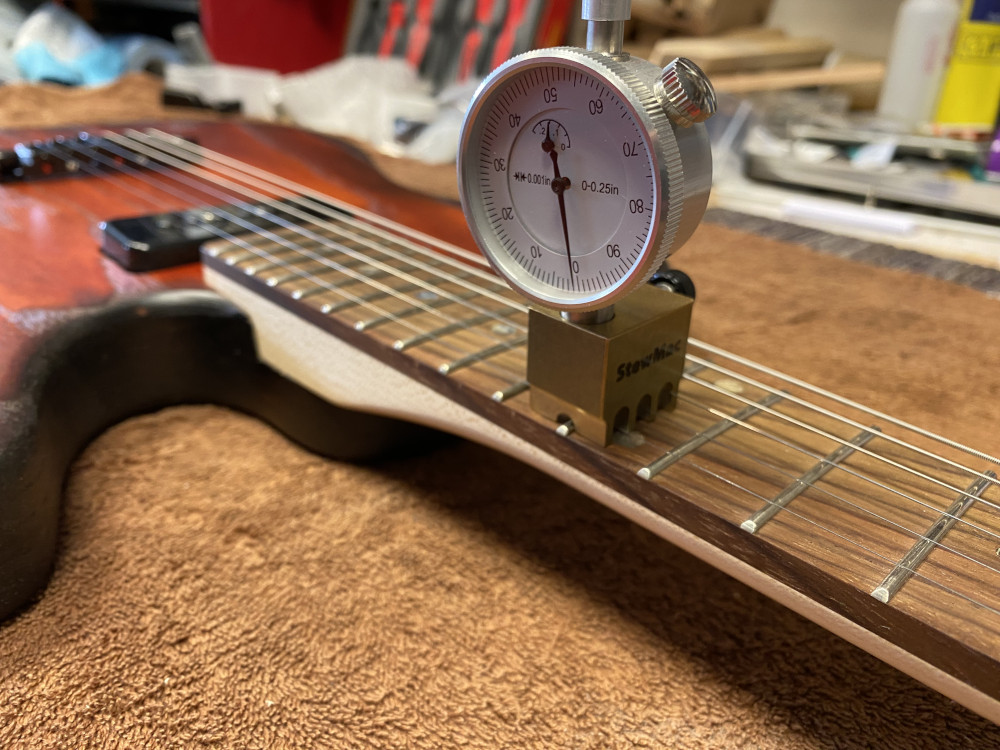
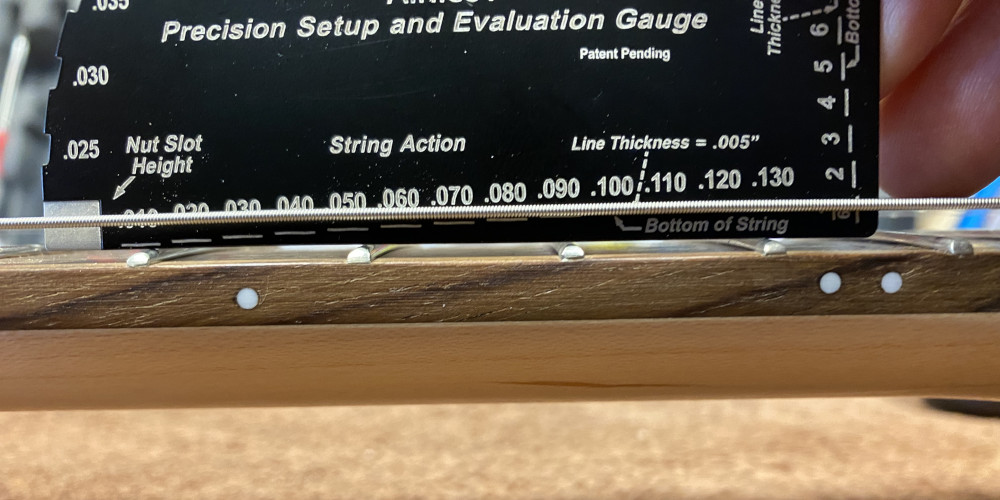
Measure string height using a ruler or feeler gauges to measure the distance between the bottom of the strings and the top of the 12th fret. This measurement should typically be between 1.5 to 2.5 millimetres (0.059 to 0.0787″) for the low E string and 1 to 2 millimetres for the high E string, depending on personal preference and playing style. The table below lists the typical action heights we use at Munson Guitars.
String Height at the 12th Fret
| Low Action | Medium Action | High Action |
| Low E: 1.6mm (.063”) | Low E: 2.5mm (.098”) | Low E: 3.5mm+ (.138”) |
| High E: 1.5mm (.059”) | High E: 2.4mm (.094”) | High E: 3.4mm+ (.134”) |
Now that you have the high and low strings set to the correct height, use the fret radius gauge to adjust the rest of the strings so that they all just touch the radius gauge.
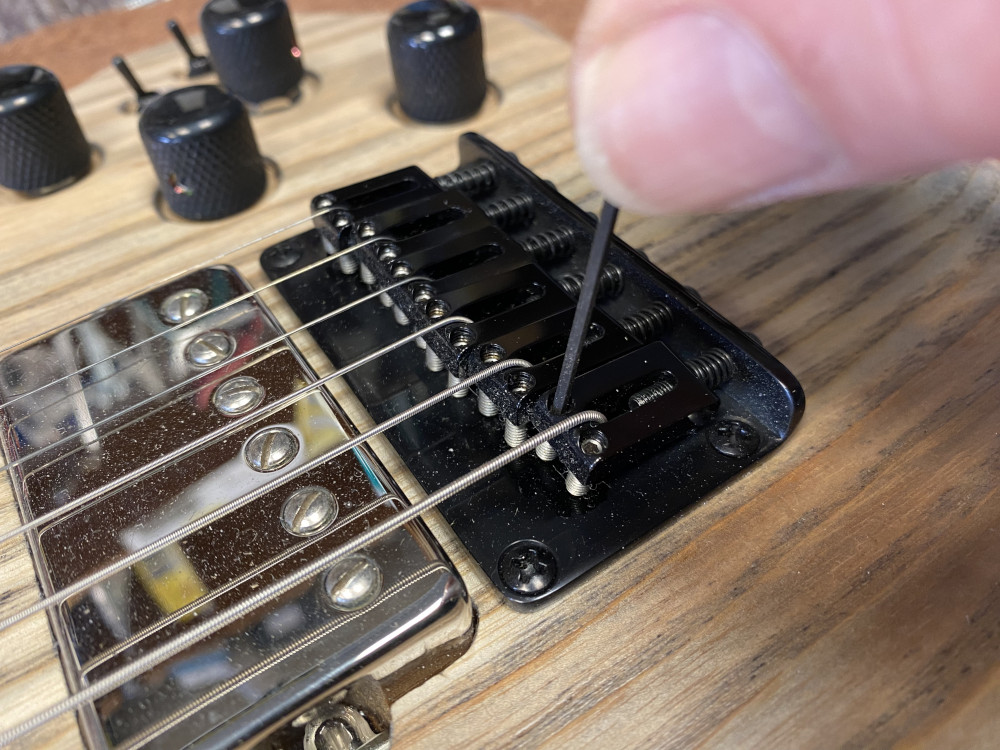
If individual saddle adjustments are necessary, use Allen wrenches to raise or lower each saddle to achieve the desired string height. Ensure that adjustments are made evenly across all strings to maintain proper intonation and playability.
In addition to bridge saddle height, the nut’s slot depth also affects string action. Inspect the nut slots and adjust them as needed to ensure the strings sit at the correct height and angle. Adjusting the nut is best left to a professional as a set of good nut files are not cheap.
String Height at the 1st Fret
| Low Action | Normal Action |
| Low E: 0.3mm (0.012”) | Low E: 0.76mm (0.030”) |
| High E: 0.15mm (0.006”) | High E: 0.4mm (0.015”) |
Remember that after making adjustments, re-tune the guitar to pitch and play through various scales and chords to assess playability and tone. Listen for any buzzing or dead spots and make further adjustments as necessary until the string action feels comfortable and sounds optimal across the fretboard.
I – is for Intonation
Setting the intonation of your electric guitar is a critical step in achieving accurate pitch across the fretboard. It ensures that each note played on any fret is in tune relative to the open strings. This process is crucial because even minor inaccuracies in intonation can result in chords sounding out of tune or individual notes being sharp or flat.
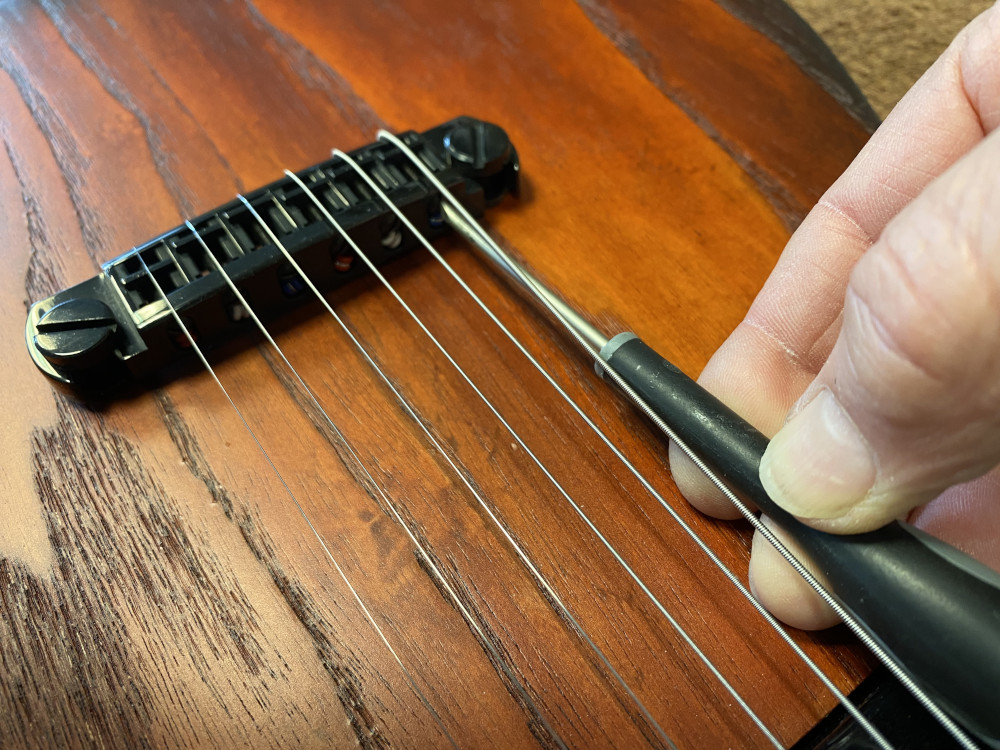
To set the intonation, you’ll need your guitar, a tuner, and a small screwdriver (usually Phillips or flathead, depending on your guitar’s bridge design). Follow the steps below to set the intonation on your instrument..
Start by tuning your guitar to pitch using an electronic tuner. Ensure each string is precisely tuned before proceeding.
With the guitar in tune, fret each string at the 12th fret and pluck it. This effectively divides the string into two equal parts.
While still holding down the 12th fret, compare the pitch of the fretted note with the harmonic at the same fret. The harmonic is produced by lightly touching the string directly above the 12th fret without pressing it down and plucking it. The scientific way of doing this is simply by using a tuner.
If the intonation needs adjusting, use the small screwdriver to adjust the saddle of the bridge. If the fretted note is sharp compared to the harmonic, the saddle needs to be moved back (towards the tail). If it’s flat, move the saddle forward (towards the neck).
Repeat the process for each string. Take your time with each string, ensuring precise adjustments for optimal intonation.
After adjusting the saddle for each string, retune the guitar to pitch and recheck the intonation. It’s common for the adjustments to affect the overall tension of the strings, requiring minor tuning tweaks.
After fine-tuning, recheck the intonation one last time to confirm that each string plays in tune across the entire fretboard. Make any final adjustments as necessary.
N – Noodle

Now it’s time to take your guitar for a test drive to make sure it plays well. Noodle away and have some fun.
Play various chords and scales across the fretboard to ensure that the guitar sounds in tune across different positions and frets. Make any final adjustments as needed to achieve optimal tuning stability and playability.
Remember that guitar strings naturally go out of tune over time due to factors like temperature, humidity, and playing. It’s a good habit to check and retune your guitar regularly, especially before performances or recording sessions.
Tools for Setting up a Guitar
Here is a list of tools used to set up a guitar.
Tuner
A tuner is essential for accurately tuning each string to the correct pitch, ensuring that your guitar sounds its best.
Notched Straightedge
A long ruler with notches cut out of each edge. The notches fit over the frets so that the straight edge sits snugly on the fretboard.
Fretboard Radius Gauge
This tool helps determine the radius of your fretboard, ensuring accurate setup adjustments and fret levelling if necessary.
Action Gauge
An action gauge measures the height of the strings above the fretboard, allowing for precise adjustments to achieve the desired action.
String Height Gauge
Similar to an action gauge, a string height gauge measures the height of the strings above the frets at specific points along the neck, aiding in setup adjustments.
String Winder
A string winder makes changing strings faster and more efficient by quickly rotating the tuning machine posts.
Feeler Gauge
A feeler gauge consists of precise metal strips that are useful for measuring small gaps, such as the distance between the strings and the frets. Feeler gauges come in various thicknesses and can help achieve precise action adjustments.
Allen Wrench
Depending on the guitar’s bridge design, you may need Allen wrenches to adjust individual saddle heights. Most modern electric guitars with adjustable bridges use Allen screws to raise or lower each saddle.
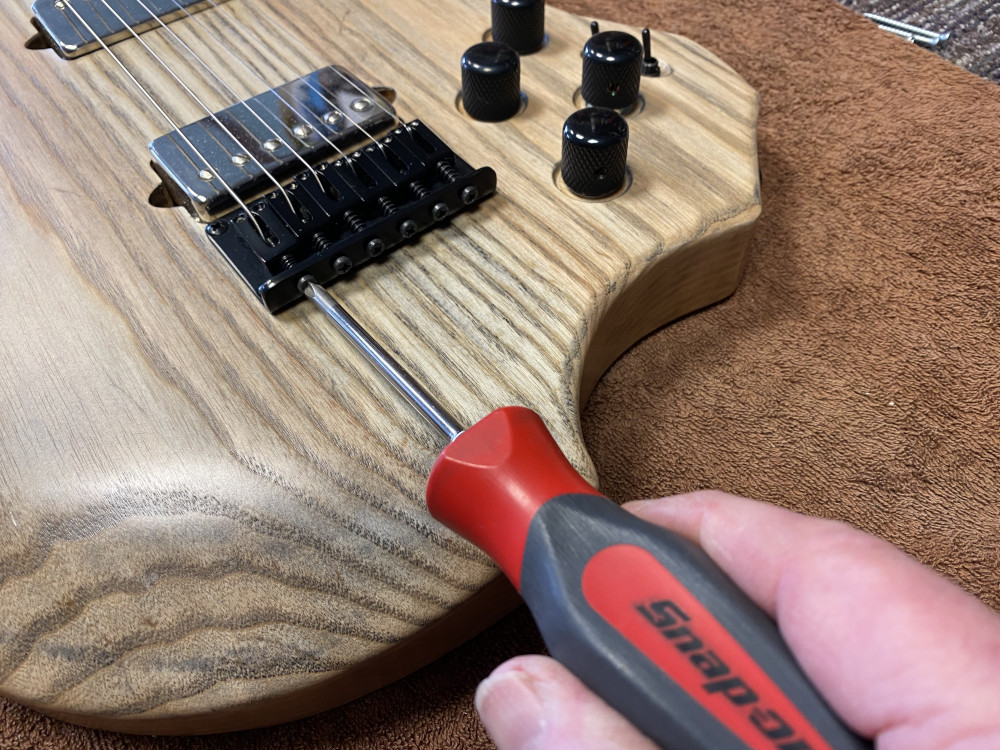
Screwdriver
Some guitars may require screwdriver adjustments to raise or lower the bridge assembly as a whole. Phillips or flathead screwdrivers of appropriate sizes are necessary for this task.
Nut files
A set of files, one of each string gauge, used to lower the string height at the nut if required. It takes some skill to adjust the nut slots, so if adjustment is required, then I would recommend taking the instrument to a guitar tech or luthier.
Bonus – Stretching In Strings
There is a lot of misconception over the ‘stretching in’ of strings. Strings are specifically designed and made not to stretch, period. They would be useless if they stretched as soon as you fitted them. In fact, it can be argued that ‘stretching in’ actually reduces the lifespan of the string due to the tension that is artificially applied.
So why do people ‘stretch in’ strings when restringing a guitar? Using conventional, non-locking tuners means that there will be several winds of string around each tuning peg. By applying tension to a string, the slack in the winds is taken up and the string will then maintain its tuning. The same can be said if the string ball is not correctly seated. Applying tension will help the ball to sit properly.
At Munson Guitars we don’t ‘stretch in’ strings at all. By design, we use locking tuners and correctly locate string ferrules, so there is simply no need to ‘stretch in’ strings. This means you can restring, tune up and start playing again without any delay or fuss.
Final Thoughts On Setting Up A Guitar
Guitars are more than just instruments, they’re stories waiting to be told. I’d love to hear about your favourite guitar, a song that’s inspired you, or a project you’re working on. Let’s keep the conversation going. Drop me a message anytime. And if you fancy a peek behind the scenes, along with a bit of guitar chat and inspiration, do sign up for our mailing list!
Keep in Touch
Stay up to date with the lastest news and offers from Munson Guitars.